I am coming to the end of the batch of resin kits I bought on my last trip to the Far East. One thing I got was M7 Priest kits that were missing the gun. While I could have somehow made a gun I have Priest models already and I have been meaning to make some Defrocked Priests for a while. These are vehicles the British converted to amroured personnel carriers by removing the gun, putting in a floor and some raised sides by welding on sheets of metal.
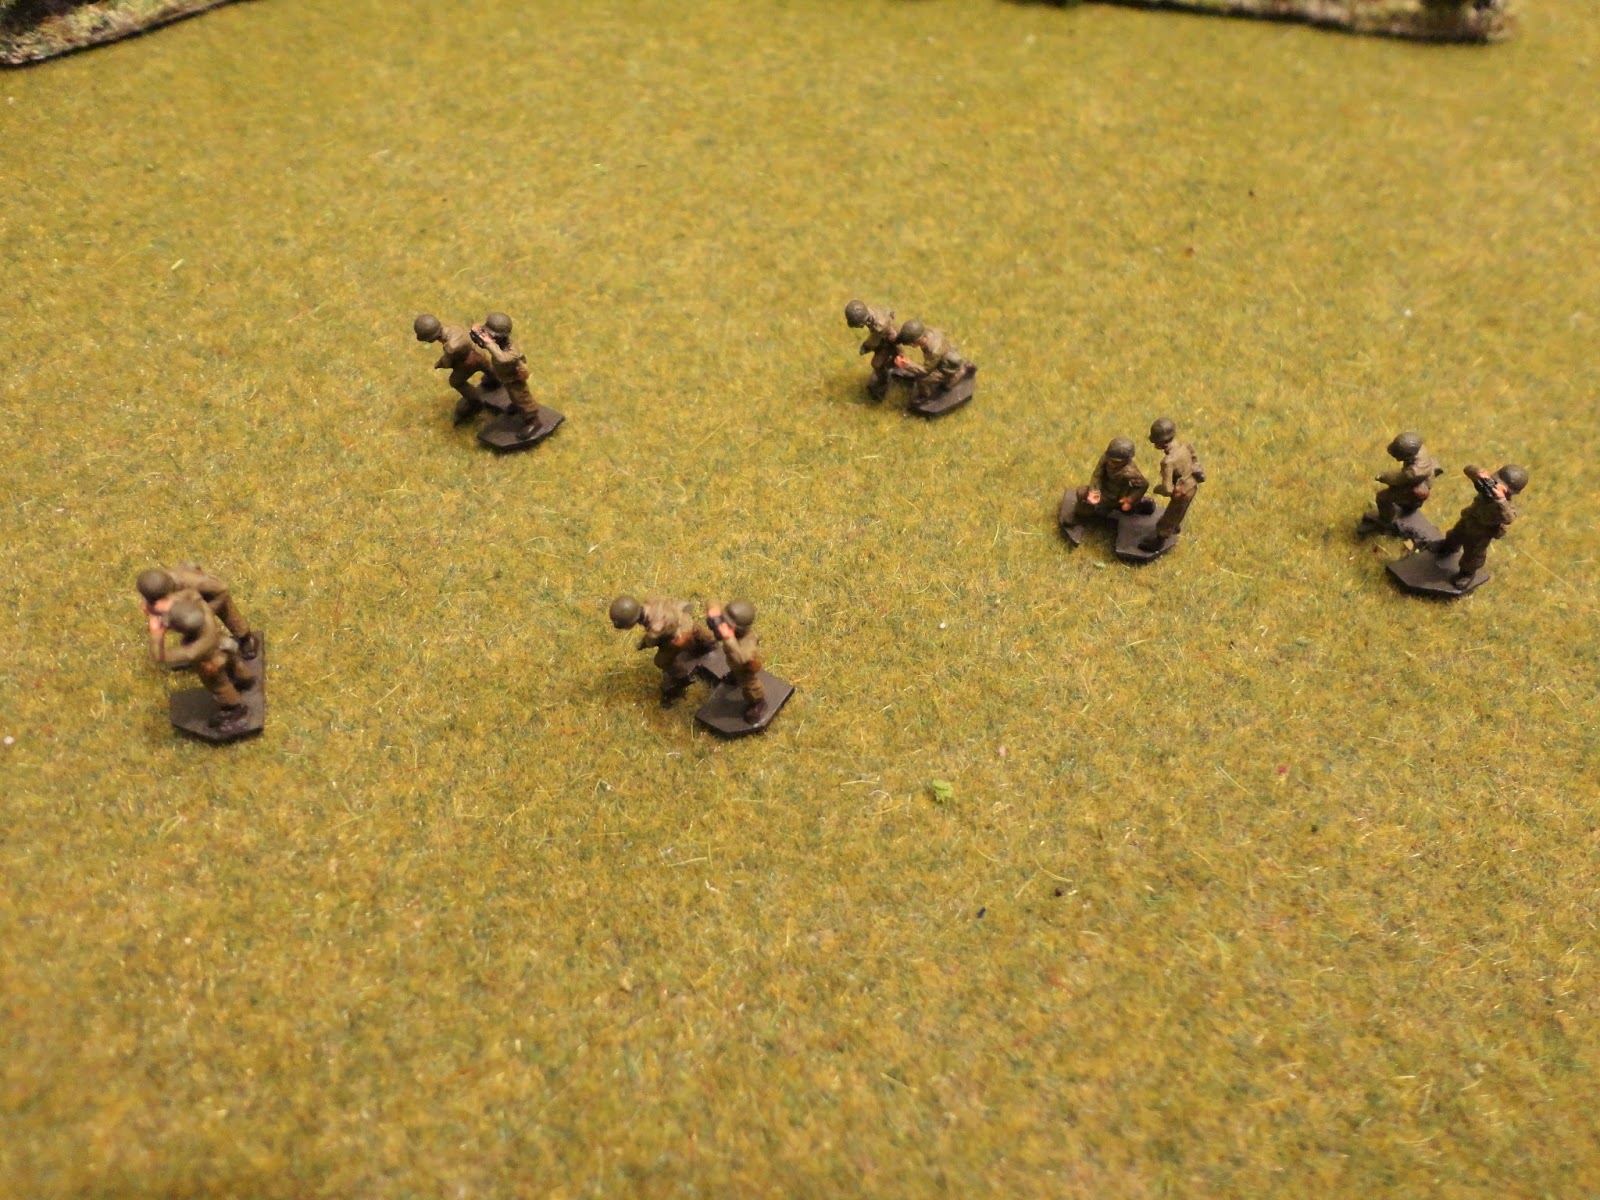
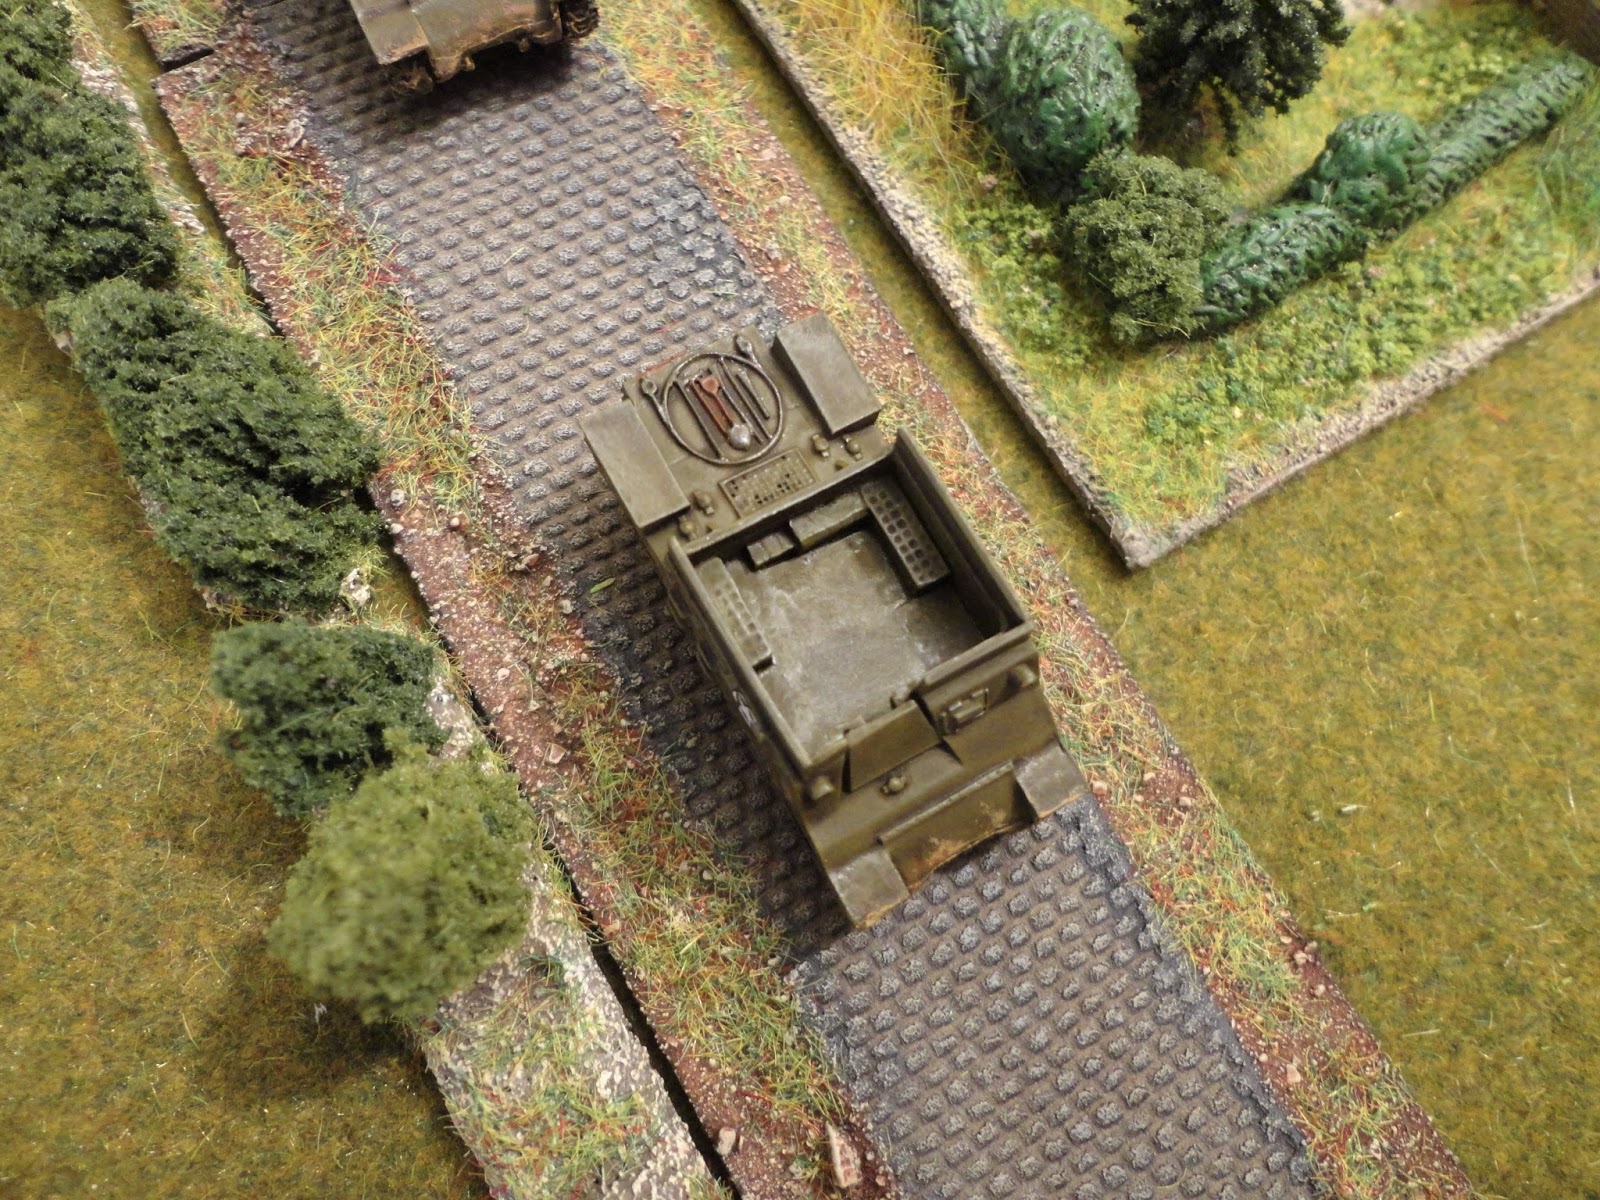
I will do as size comparison as the kits are more like 1/150 than 1/144 and talk about how I did the conversion but first some pictures of the final models:
The models are about 1:150 so I have compared with a Minifigs 10mm/12mm British Sexton. Minifigs are generally on the larger end of the 10mm manufacturers and the Priest is pretty much the same size as the Sexton.
Comparing now to a Takara 1/144 Sherman M4. The Defrocked Priest is a bit smaller but only slightly so and on a gaming table this won't be noticeable at all.
A quick run through the conversion process. First the bits that came in the kit:
The kits was very cleanly cast and required very little clean up, just the removal of the pieces where the resin flowed into the mould. The model has the legs of the gun cast into the inside of the hull and that had to be cut off to allow a flat floor to be added. I used black plasticard 0.5mm thick (or 20/000). I have taken to using black instead of white as it is better for basing (slight gaps in sand glued on really stand out with white and thinned paint does not cover it as well) plus for modelling you can see what you have done much easier when doing conversions or repairs. Some of the same plasticard was used for the piece that blocks the gun aperture and the raised sides. Given the plasticard is quite thin I cut strips of the required width with a craft knife but to get the lengths right and the shaping for the floor around the inside detail I then used nail scissors (scissors not clippers!) to cut the plasticard. It was then easy to just snip of a little bit more to get the pieces to fit properly.
While I did this conversion with some resin kits the same approach can be used on any model of a Priest, for example metal models that most manufacturers make of the Priest.
For an easy way to see all my WW2 posts check out the WW2 Summary page.
Showing posts with label Modelling. Show all posts
Wednesday, 25 May 2016
Tuesday, 12 April 2016
British captured Sd kfz 251 artillery HQ vehicle
I recently got a job lot of 1/144 tanks and it included some Takara Sd kfz 251s which are OK in terms of detail but not that good a paint job and no MG at the front, just the shield. As I have plenty of German half tracks I decided to do one as a captured British vehicle used for the HQ of an artillery battery as shown in the Flames of War book for Market Garden.
I added a Pendraken British officer figure by cutting the base off and gluing in the vehicle. I also added an allied MG which was again a Pendraken item - British roof top MG.
In case of interest you can check out an earlier post I did on Flames of War warrior units done in 10mm.
For an easy way to see all my WW2 posts check out the WW2 Summary page.
Sunday, 27 March 2016
Crew for Minifigs M7 Priest
Some years ago now, when I started turning my Takara models into wargames units and then looking to buy other models to fit in with them I bought some Minifigs vehicles and M7 Priests were among the first models I got. However, I later came across Wargames South and Pendraken and Pithead and decided I was not that keen on Minifigs and have since replaced virtually everything. I did do some crew figures for the Priests to allow them to be removable.
The figures are Minifigs artillery crew cut off their bases and glued on plasticard. The plasticard is cut so that the crew unit will fit in the Minifigs M7 Priest around the 105mm breach and so can be put in or taken out of the vehicle as needed.
They don't fit in the Arrowhead M7 Priests I am now doing and would need to have a new base made so I will probably just make some new ones using Pendraken artillery crew to go on the properly sized base to fit the Arrowhead model.
For an easy way to see all my WW2 posts check out the WW2 Summary page.
Tuesday, 22 March 2016
Pimp your Tiger - Takara versus Tiger 1
I have done a few posts on improving Takara vehicles. They are good models but the paint job is sometimes a bit basic and the equipment on the vehicle needs repainting and a wash added to the vehicle. Here are some previous posts:
Takara winter white Panthers
Takara versus set King Tiger
Takara Wittmann Tiger 1
I have now done a Tiger 1 from the Takara versus set. The model is pre-painted for 'Battle of Normandy'. I added an Arrowhead commander figure by drilling a hole through the turret hatch and glued in the commander figure and then used a hatch from a CanDo Panzer Korp kit (they always provide 2 for each model). My original intention was then to repaint the model with a German sand base but having got rid of or repainted all my Tiger 1s in this paint scheme I decided to keep it in its pre-painted colour scheme. But I did the following:
For an easy way to see all my WW2 posts check out the WW2 Summary page.
Takara winter white Panthers
Takara versus set King Tiger
Takara Wittmann Tiger 1
I have now done a Tiger 1 from the Takara versus set. The model is pre-painted for 'Battle of Normandy'. I added an Arrowhead commander figure by drilling a hole through the turret hatch and glued in the commander figure and then used a hatch from a CanDo Panzer Korp kit (they always provide 2 for each model). My original intention was then to repaint the model with a German sand base but having got rid of or repainted all my Tiger 1s in this paint scheme I decided to keep it in its pre-painted colour scheme. But I did the following:
- repainted all the equipment on the tank (axes, cables, track links etc.);
- painted the commander and new hatch cover;
- gave the whole thing a wash in Games Workshop Agrax Earthshade;
- put some mud effect on the wheels and tracks and edges of the vehicles (Vallejo Flat Earth and German Camouflage Orange Ochre).
Finished model shown below form various angles:
For an easy way to see all my WW2 posts check out the WW2 Summary page.
Sunday, 20 March 2016
British motor company
Here is my British Motor Company of two platoons. I have just finished the last few stands and some basing.
It consists of:
The figures are Arrowhead/ Wargames South
The light mortar figures for this platoon are Pendraken.
Company command stand. White Scout car is Pithead
Company 2iC. The mortars and figures are Pendraken as is the middle figure on the 2iC stand.
The half-tracks are New Millennium Toys with a repaint and some conversion. Here is what they originally looked like.
The model is not bad but no driver seats.
The first thing that is needed it to remove the HMG ring on the front. The vehicle is then repainted in proper British colours and decals added (the big star on the bonnet I just painted round).
I then added some spare crew (driver) figures and one one a figure standing up with a Bren gun.
For an easy way to see all my WW2 posts check out the WW2 Summary page.
It consists of:
- company HQ with command and 2iC plus two 3 inch mortars and White Scout cars;
- 1st platoon with 3 sections and a piat and light mortar stand and the platoon command;
- 2nd platoon with 3 sections and a piat and light mortar stand and the platoon command.
The figures are Arrowhead/ Wargames South
The light mortar figures for this platoon are Pendraken.
Company command stand. White Scout car is Pithead
Company 2iC. The mortars and figures are Pendraken as is the middle figure on the 2iC stand.
The half-tracks are New Millennium Toys with a repaint and some conversion. Here is what they originally looked like.
The model is not bad but no driver seats.
The first thing that is needed it to remove the HMG ring on the front. The vehicle is then repainted in proper British colours and decals added (the big star on the bonnet I just painted round).
I then added some spare crew (driver) figures and one one a figure standing up with a Bren gun.
For an easy way to see all my WW2 posts check out the WW2 Summary page.
Sunday, 15 November 2015
653. Schwere Panzerjägerabteilung - Elefants
Ever since I came across the Flames of War briefing for this unit I was keen to make one. And as I generally like to complete things I have done it at full strength. Not quite sure when I will get all 12 Elefants on the table but I am sure I can come up with some scenarios that require the Germans to move with tricky conditions so vehicles get left behind.
If you are interested here is a link to the FOW briefing.
I have done the more interesting HQ unit:
If you are interested here is a link to the FOW briefing.
I have done the more interesting HQ unit:
- Tiger (P) VK 4501 (i.e. the Porsche Tiger 1);
- Bergepanther with a stationary Panzer IV turret;
- Bergepanther with a quad 2cm anti-aircraft gun;
- Bergepanzer Elefant recovery vehicle.
- T-34 with a quad 2cm anti-aircraft gun.
I will talk about where these all came from alongside the pictures.
Can Do models are better painted than Takara but the downside is that it is then difficult to match colour if you want to change the tank numbers. For Takara it is easy to paint over the numbers and add new ones so a unit has a proper sequential numbering. I did not want to ruin the paint jobs so I made do with tanks having the same number.
This first platoon are all numbered 501 but I have added a Pithead crew man to one to indicate the command tank. All vehicles throughout have a wash of Games Workshop Agrax Earthshade and mud effect on the tracks and wheels.
The next platoon has three vehicles numbered 211 and the command tank with number 102.
The next platoon has three vehicles numbered 322 and the command tank with number 102.
The HQ
Tiger (P) VK 4501
This is a Takara model with a wash of Games Workshop Agrax Earthshade and mud on the wheels and tracks. There is a case special for the Can Do Elefant set (series 8) which is the actual tank for this unit but I have not managed to get hold of one. At some point I will do a Takara version with the right turret number.
Bergepanther with a stationary Panzer IV turret
This is a Takara Panther hull with a Takara Panzer IV turret fixed to the hull. As normal a wash and mud on the wheels. Some crosses added to the turret armour.
Bergepanther with a quad 2cm anti-aircraft gun
This is a Takara Panther hull with a Minifigs 20mm quad painted to match and glued in place. A wash and mud applied. Some cross decals added to the front of the hull side.
Bergepanzer Elefant recovery vehicle
This is a pre-painted Can Do model (series 8) with a wash and mud applied.
T-34 with a quad 2cm anti-aircraft gun
This is a CDG model. I bought the pre-painted version. It is an early model so was when their 3D printing gave a fairly rough finish but it is not bad actually. I gave it a bit more of a dry brush and added mud.
For an easy way to see all my WW2 posts check out the WW2 Summary page.
Subscribe to:
Posts (Atom)