Wednesday, 25 May 2016

Sherman Jumbo

Pithead recently brought out a Sherman Jumbo model - Pithead are 10mm models mostly in metal (a few trucks are resin or part resin). I have a lot of Pithead as they are nice models and great value, but also are a reasonably large 10mm so they fit in with 1/144 scale pretty well even for the larger tanks.

I have been after the Sherman Jumbo for a while as I already have models for the other variants I want to use. I did get some Pendraken models a while back, plus I did an earlier post on them, but they are noticeably small compared to 1/144 Shermans and although the detailing was nice I still wanted a model more in keeping with my other models (particularly for something with 'jumbo' in the name).

First some pictures of the completed models and then some size comparisons including a look back at the Pendraken version. I have also included at the end a brief overview of some of the things I did making the tanks.


This one includes stowage from the stowage and crew set you can buy with a tank (as an add on extra not to be bought separately). I did not add the crew figure as it comes with open hatches moulded on and it is the wrong sort of hatch for the Jumbo and I will be using him on M4A3 Shermans.


Now comparing to a Takara M4A3 Sherman. On height the Pithead model compares well and is just slightly narrower and slightly shorter. On single dimensions the differences are not large but the overall effect is less bulk to the vehicles but unless they are sat right next to each other it is not at all noticeable for gaming.


Comparing to the Arrowhead 1/144 Easy Eight it again matches up well with the main difference here being on the width.


A quick reminder of the Pendraken model and a comparison with a Takara M4A3. I no longer have the model so can't directly compare with the Pithead version but you can see pretty easily that it is much smaller.


I don't normally discuss making Pithead models but I just wanted to cover a couple of things. First the turrets. The turret is hollowed out inside and has a pin to sit in the hull that does not project far beyond the turret bottom so it sits loosely on top of the hull.


Sorry about the terrible photo but I hope it is at least clear that from a rear view you can see daylight from the front of the turret because of the hollowing out given the rear of the turret slopes up.


I cut off the pin and filled the inside of the turrets with milliput.


I then drilled a hole and glued in a piece of brass rod.


My favourite Jumbo is actually one that came with the wrong hull - an M4A3 hull. I added the extra side armour by cutting out and gluing on some thin plasticard. I added the girder piece across the bottom of the front glacis from some Takara bits. The MG was a stump so I drilled out and added a new one cut from a pin and finally added some stowage from the Pithead stowage set.


So it is quite easy to convert a hull for a Jumbo but the turret is a different matter!


For an easy way to see all my WW2 posts check out the WW2 Summary page.

Defrocked Priest APC

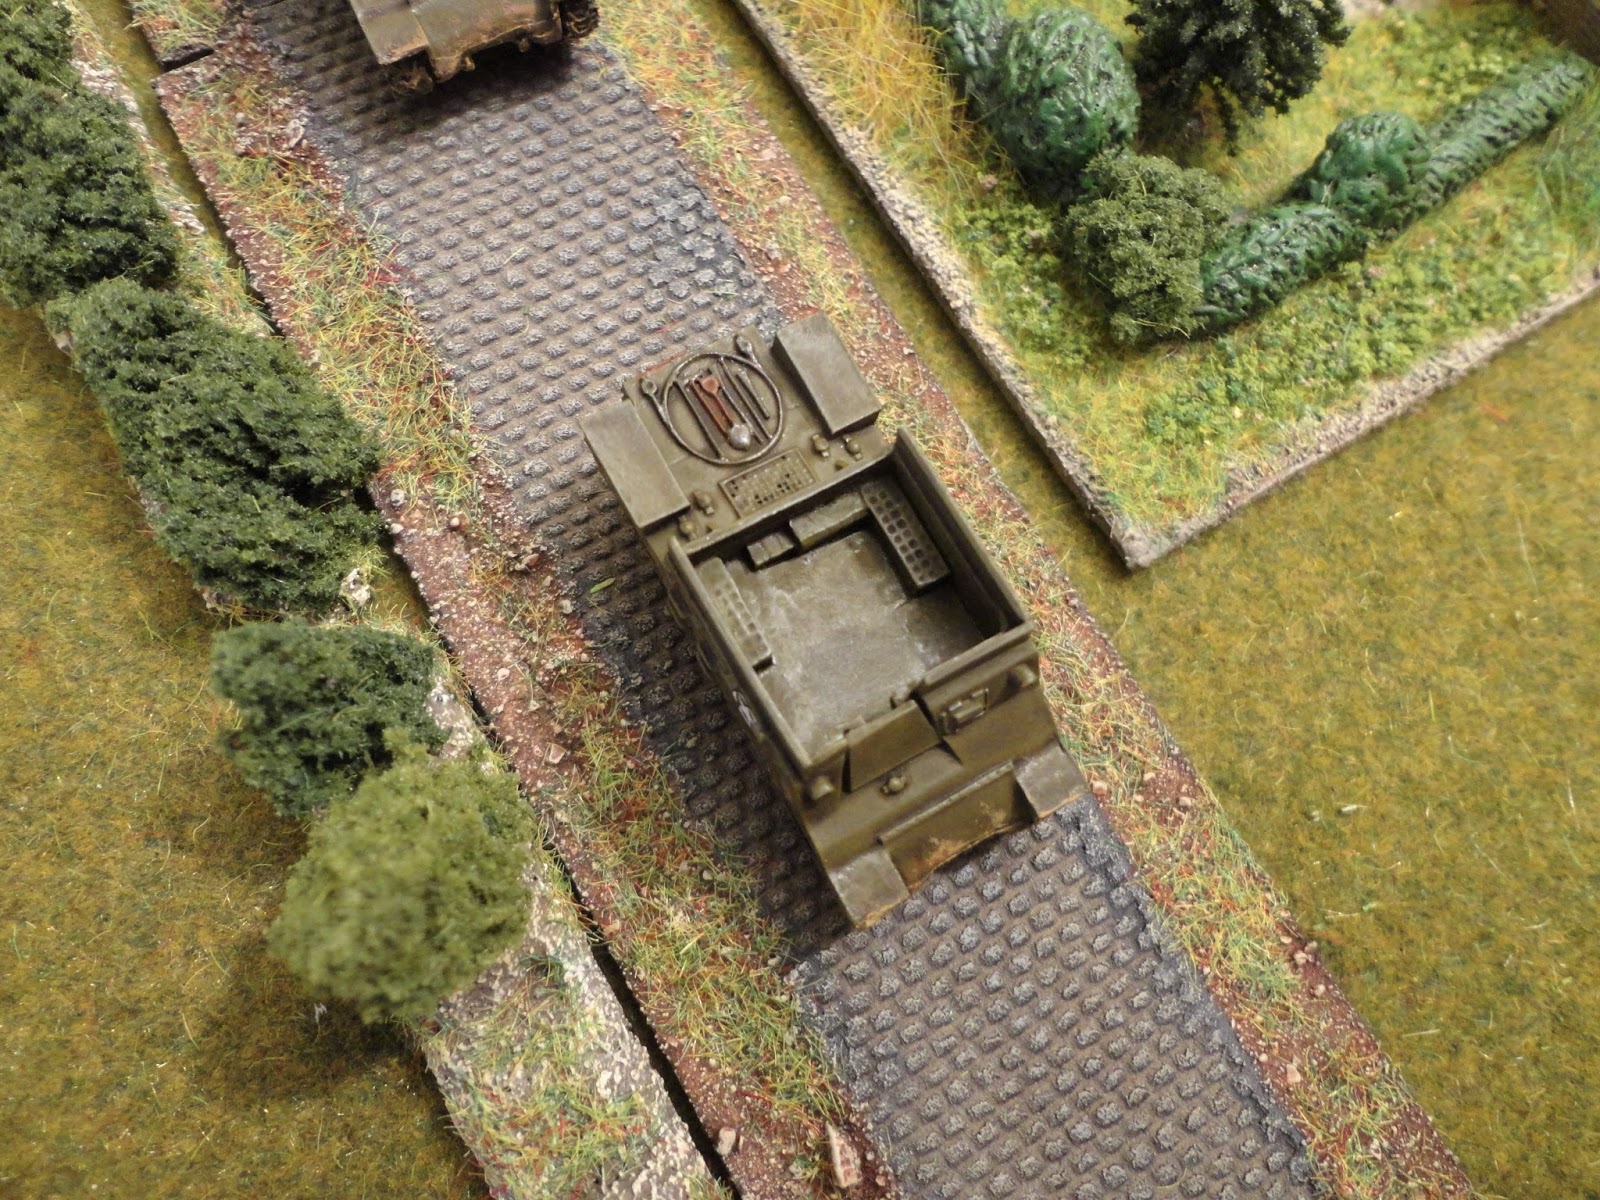
I am coming to the end of the batch of resin kits I bought on my last trip to the Far East. One thing I got was M7 Priest kits that were missing the gun. While I could have somehow made a gun I have Priest models already and I have been meaning to make some Defrocked Priests for a while. These are vehicles the British converted to amroured personnel carriers by removing the gun, putting in a floor and some raised sides by welding on sheets of metal.

I will do as size comparison as the kits are more like 1/150 than 1/144 and talk about how I did the conversion but first some pictures of the final models:


The models are about 1:150 so I have compared with a Minifigs 10mm/12mm British Sexton. Minifigs are generally on the larger end of the 10mm manufacturers and the Priest is pretty much the same size as the Sexton.


Comparing now to a Takara 1/144 Sherman M4. The Defrocked Priest is a bit smaller but only slightly so and on a gaming table this won't be noticeable at all.


A quick run through the conversion process. First the bits that came in the kit:


The kits was very cleanly cast and required very little clean up, just the removal of the pieces where the resin flowed into the mould. The model has the legs of the gun cast into the inside of the hull and that had to be cut off to allow a flat floor to be added. I used black plasticard 0.5mm thick (or 20/000). I have taken to using black instead of white as it is better for basing (slight gaps in sand glued on really stand out with white and thinned paint does not cover it as well) plus for modelling you can see what you have done much easier when doing conversions or repairs. Some of the same plasticard was used for the piece that blocks the gun aperture and the raised sides. Given the plasticard is quite thin I cut strips of the required width with a craft knife but to get the lengths right and the shaping for the floor around the inside detail I then used nail scissors (scissors not clippers!) to cut the plasticard. It was then easy to just snip of a little bit more to get the pieces to fit properly.


While I did this conversion with some resin kits the same approach can be used on any model of a Priest, for example metal models that most manufacturers make of the Priest.


For an easy way to see all my WW2 posts check out the WW2 Summary page.

Saturday, 14 May 2016

Panther Super Coelian Flakzwilling

I managed to get hold of some resin kits of the Panther Coelian Flakzwilling 44 when last in Taiwan. I have a previous post on the first one I did - here. I wanted to do a couple as the Panther Super Coelian Flakzwilling i.e with bigger longer barrel guns. I had to come up with a way of making the barrels which I will describe later in the post.


I did a couple as the Panther Coelian Flakzwilling 44 but replaced the resin barrels made in the same way as the Super Coelian guns.


Here are a few shots of the turrets with the replacement metal barrels for both the Coelian and Super Coelian.


I made the barrels by using lengths of normal domestic pins cut to the required length (snipping off the head and point with pliers). The muzzle pieces I cut from a length of tubing I had from a model shop. I cut the pieces off with a junior hacksaw as a saw makes sure the tube is not squashed. It then needs to be filed to be flat at each end (given the pieces are small the exposed end needs to be filed before cutting a piece off then it is glued on the end of the pin piece with the newly cut end showing so it can then be filed more easily). The tricky bit is drilling into the resin to glue in the new metal barrels - it just needs the right size drill bit and a very slow careful drilling action making sure the bit starts out in the centre of the resin part of the barrel as it is not that much thicker than the pin.


A couple of comparison shots of the Panther Coelian Flakzwilling 44 with the original resin barrels and with the replacement metal barrels. The resin barrels are slightly wonky but also rather fragile so I am much happier with the metal replacements.


In case of interest, links to my other experimental and prototype tank posts:

T28 super heavy tank (USA)
M6A2E1 heavy tank
Tortoise A39
Boarhound armoured car (Shapeways)
TOG 2 heavy tank
T-100z
T-100Y
KV5
KV 220
T44/ 85 (full platoon)
Prototype Tiger 1, Ausf H2
Dicker Max and Sturer Emil
Neubanfahrzeug
Panzer VII Löwe (Lion)
JgPz E 75 "Jagd Panther II"
Panther Coelian Flakzwilling 44
E75 standard tank (Tiger III)

For an easy way to see all my WW2 posts check out the WW2 Summary page.