Monday, 31 August 2015

Wespe battery

I have had these for ages but as mentioned in some earlier posts I stopped half way through a lot of Germans as I had problems with coverage for the Vallejo Midstone paint. My new pot is fine and so I have been completing things. I have also added foliage camouflage given my recent experience with my Stug company. The model is from Arrowhead (Wargames South still at the time I bought them) and is a lovely little model.


Various shots of the Wespes. I have given them markings for 1st SS-Panzer Division Leibstandarte SS Adolf Hitler and with the camouflage the aim is for Normandy battles.


 Some views inside the back:


And a close up of the bits of equipment moulded on to the model:


The battery has two Panzer III observer tanks. This is the one without a gun but a fake one added - off centre. The model is a 1/144 Can Do pre painted model and I have given it a wash with Games Workshop Agrax Earthshade and added camouflage.


Finally the staff stand which is a Pendraken set of figures with artillery range finders. The crates and sacks in front are actually 6mm Napoleonic from Perfect Six but are great for 10mm WW2 - you can see an more detailed review I did earlier.


For an easy way to see all my WW2 posts check out the WW2 Summary page.

Skoda 3000 staffcar

A very quick post as I have just finished this Skoda 3000 staffcar from Pithead. I will use for various company command units I guess but just though I would share as I really like how this turned out.


For an easy way to see all my WW2 posts check out the WW2 Summary page.

Stug III company - with foliage camouflage

I recently did a tutorial for adding realistic foliage camouflage to 10mm tanks. I have now done the full Stug III company - two platoons of 5 tanks each and a command HQ of two vehicles. Because the foliage is very bespoke each tank is unique and gives a really nice effect. Once you have done one it is quite easy to do and pretty quick. I tended to cut about 6 to 8 bits, glued them and then added to several vehicles so that I gradually gave each on a full set of 'branches'. I would then do the 'leaves' on the 3 or 4 vehicles with branches on while the next batch were drying enough to move on to the next stage.


About half of the Stugs have 10th SS divisional markings but you will need to click the photo to expand to see it!


For an easy way to see all my WW2 posts check out the WW2 Summary page.

Semovente 75mm and M41 Carro Comando

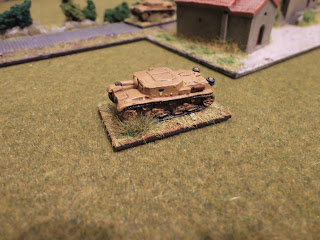
Another freshly completed unit to add to my small Italian force. These are Pithead models, the Semovente 75mm and the M41 Carro Comando. Nice models and they come up well in the paint scheme (Vallejo Green Ochre).

Decals are also by Pithead and I will do a separate review covering their use on different vehicles at a later date.


Some close up shots of the Semoventes:


Front licence number - need to click on photo to expand to see properly.


Rear licence number - need to click on photo to expand to see properly.


The M41 Carro Comando:


For an easy way to see all my WW2 posts check out the WW2 Summary page.

Italian Carro Armato P40 revisited

I posted a review of these after first completing - here. I mentioned at the time I wanted to add some Italian tank markings and having got hold of the decals I have added these now as well as deciding to base the tanks. So here are the final finished articles.


Front number plate - you can see quite easily if click on photo to expand.


Rear number plate - you can see, but still a bit dark, if click on photo to enlarge


Markings on turret for  1st Tank, 1st company.


For an easy way to see all my WW2 posts check out the WW2 Summary page.

Russian SU-12 75mm SPG

I have been wanting this truck mounted Russian 75mm howitzer for ages - I have seen resin kits or resin ready made versions on ebay from Hong Kong but serious expensive and only sold one at a time (so no guarantee I could get a unit even if I wanted to splash out). Pithead finally brought one out a couple of months ago so I got myself some. 

I have glued the gun turret in place in different positions as the gun only sits on the truck in a wobbly sort of way otherwise. Plus to be honest, other than larger tanks, I prefer to glue small turrets in place for gaming (and I don't bother with the rules in FOW about where the turret is pointing as I think that is excessive 'realism' for such abstracted rules).


I could not locate my army book at the time I ordered and got a few too many so I sold the spares on ebay - but the buyer wanted the turret to move so I now have a chance to show you how to approach making the turrets rotate if you so wish (even though I don't!).

First, sorry the colours are a bit weird, I took them on my workbench and the light was not ideal but given what I am trying to show I guess no big deal.

I used my modelling hand drill to drill out the hole in the truck to go right through. I made a similar hole in the bottom of the gun turret and then super glued in a piece of brass rod - sticking out a fair way so that it would be stable when inserted into the truck.


Once done it sits nicely on the truck with out leaning or wobbling. It also then has the desired effect to be able to position the gun as you wish.


For an easy way to see all my WW2 posts check out the WW2 Summary page.